
Fashion
T-Shirt Design Placement Guide: Exact Measurements, Locations, and What Works Where

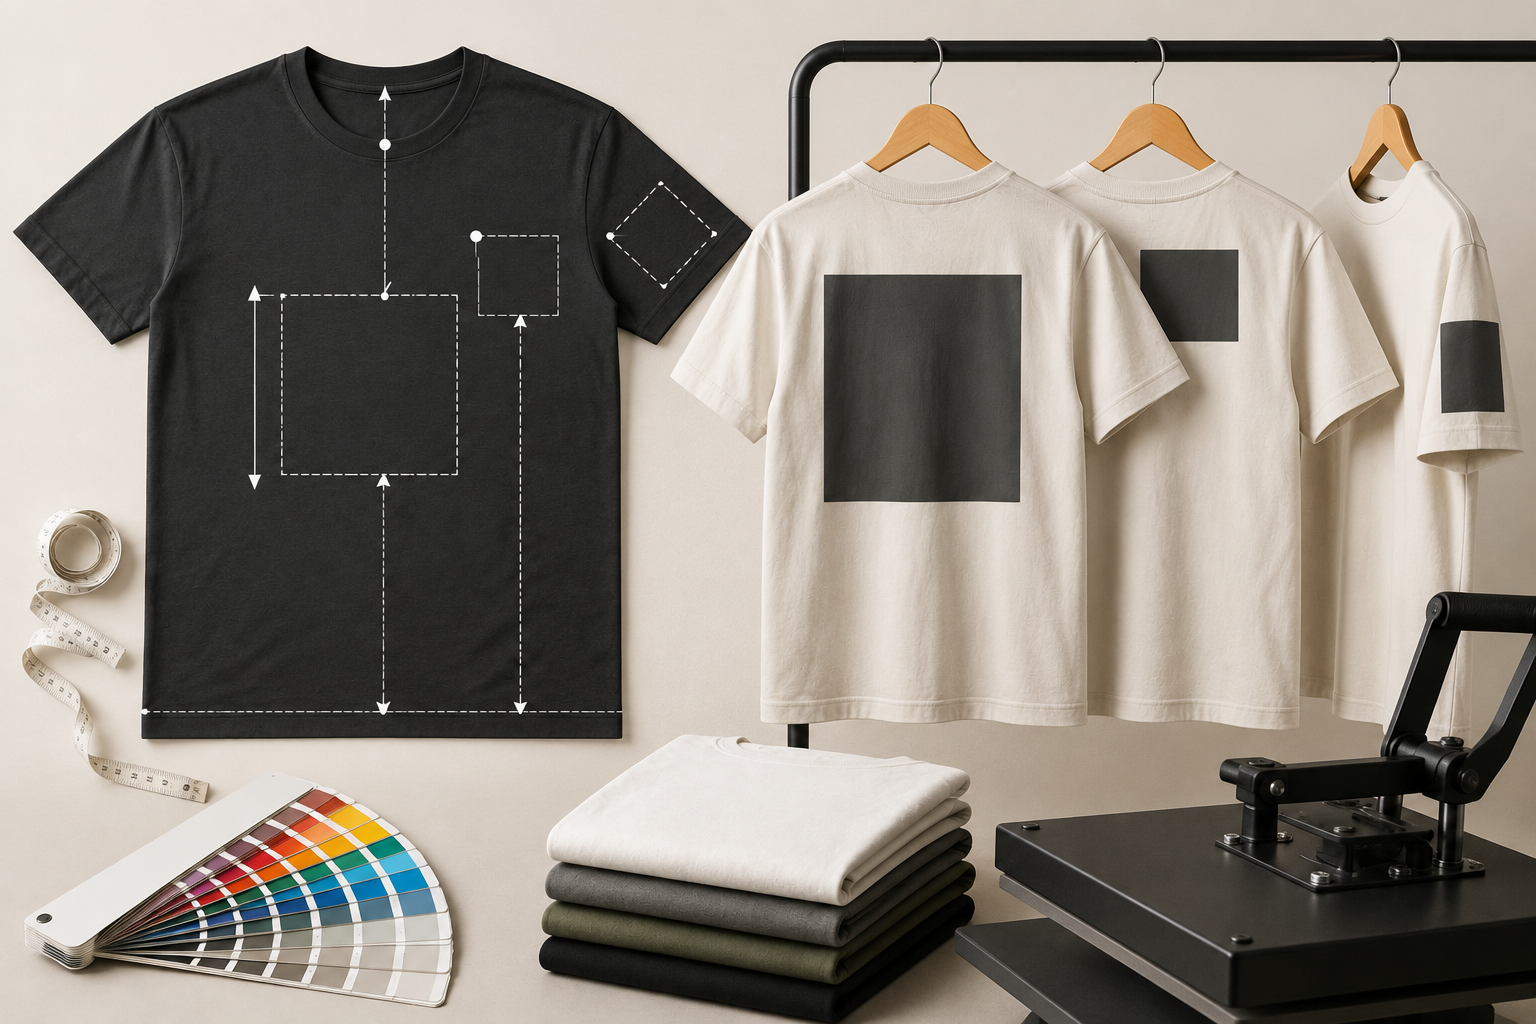
A great design placed in the wrong spot is still a bad shirt. That’s one of the most common lessons new apparel designers learn the hard way, usually after an entire print run comes back looking slightly off without anyone being able to pinpoint exactly why.
Design placement is the part of the custom apparel process that gets the least attention and causes the most problems. Most guides stop at telling you to center your graphic on the chest. The reality involves anchor points, measurement from specific collar positions, size adjustments across garment sizes, and a working understanding of how different placements serve different purposes.
This guide covers all of it. Whether you’re working on your first custom tee or trying to understand how to design shirts that hold up across production runs and size ranges, the measurements and principles here give you a framework that actually transfers to finished garments.
Why Placement Matters More Than Most Designers Expect
The visual logic of a design on screen and the physical reality of that same design on a body are two different things. A centered graphic that looks balanced in your design software can appear to float awkwardly on a real shirt, especially when the wearer is moving, or when the garment is photographed flat versus on a mannequin.
Placement decisions also affect durability. Designs that extend too close to seams are more vulnerable to cracking and peeling over time, because fabric flexes more at structural joints. A graphic positioned across the chest center sits on a relatively stable area of fabric. The same graphic shifted toward the armhole sits in a high-movement zone.
Then there’s the question of purpose. A left chest logo communicates professional branding. A full-front graphic communicates streetwear or artistic intent. An upper back placement with a small text treatment reads like event merchandise. Placement sends a signal before anyone reads a word of the design itself, and that signal should match what you’re trying to say.
“Where you place a design says as much about your brand as what the design actually shows. Placement is a creative decision, not just a technical one.”
Placement Quick Reference: Measurements at a Glance
| Placement | Position | Recommended Size | Best For |
| Left Chest | 3″ below collar, 2″ from armpit | 2.5″ x 2.5″ to 5″ x 5″ | Logos, corporate branding, minimal icons |
| Center Chest | 3″ to 3.5″ below collar, centered | 8″ x 8″ (standard) | Artwork, text, main graphic designs |
| Full Front | 2″ to 3″ below collar, full width | Up to 12″ x 16″ | Streetwear, bold graphics, statement tees |
| Upper Back | 2″ to 3″ below collar, centered | 6″ to 8″ wide | Event tees, subtle brand messaging |
| Full Back | 3″ to 4″ below collar, centered | 12″ to 14″ wide | Sports uniforms, band merch, large artwork |
| Sleeve | 3″ from shoulder seam | 3″ to 4″ wide | Secondary branding, subtle detail work |
Front Placements: The Full Breakdown
Left Chest
The left chest is one of the most used and most recognisable placements in custom apparel. It sits over the heart, which is why it carries a certain understated authority. Corporate polos, hotel uniforms, and sports team kit all default to left chest placement because it communicates professionalism without visual aggression.
Position the design approximately 3 inches below the neckline and 2 inches from the armhole seam. The design should sit proportionally within that corner space, neither crowding the collar nor drifting toward the sleeve. Size between 2.5 and 5 inches square is the functional range, with most standard logo placements sitting around 3.5 to 4 inches wide.
One consistent mistake with left chest placement is using designs that are too detailed at small sizes. At 3.5 inches wide, fine lines, small type, and intricate elements disappear. Clean shapes, bold outlines, and legible text are what work at this scale. If your design has detail that matters, either enlarge the placement or move it to center chest where it has room to breathe.
Center Chest
Center chest is the most flexible placement on the front of a shirt. It handles logos, text-heavy designs, illustrated artwork, and typographic treatments equally well, because it has the most usable surface area of any front placement.
Standard positioning is 3 to 3.5 inches below the collar, centered against both shoulder seams. Standard size is 8 by 8 inches for adult garments, though the actual design can be portrait or landscape within that footprint. The 8-inch width is a practical reference point, not a fixed constraint, but going significantly wider than that starts to affect how the design reads when the shirt is worn.
Center chest is where most brand graphics, illustrated prints, and text-statement designs belong. It gives the eye a natural landing point when someone looks at the shirt front, and it scales consistently across size ranges without the proportional distortion that can affect designs placed closer to edges.
Full Front
Full front placement is exactly what it sounds like: a large-scale design that dominates the entire front face of the shirt. Starting 2 to 3 inches below the collar and extending toward the hem, a well-executed full-front graphic has genuine visual impact. Streetwear brands, music merchandise, and fashion-forward apparel lines use it heavily for this reason.
The size ceiling is typically around 12 by 16 inches on adult garments, though this varies by print method. DTG (direct-to-garment) printing handles large full-front designs well. Screen printing at this size requires more careful setup but can produce excellent results with the right colour separation.
Full front placement requires designs that justify the scale. A small logo expanded to fill this area looks like a mistake. Designs conceived at full scale, with composition, layering, and negative space planned from the beginning, are what make this placement work.
Back Placements: What Changes and What to Watch
Upper Back
The upper back is the back-of-shirt equivalent of the left chest: a smaller, more restrained placement that sits just below the neckline and communicates something understated. Event t-shirts commonly use upper back for secondary information like a date, location, or sponsor list. Corporate merchandise uses it for web addresses or taglines.
Position the design 2 to 3 inches below the collar, centered horizontally. Size sits in the 6 to 8 inch wide range. At this scale, legibility is the main challenge. If you’re including text, font choice matters considerably. Condensed sans-serif typefaces at this size tend to hold better than serif or decorative fonts.
Full Back
Full back placement offers the largest uninterrupted design surface on a t-shirt. Starting 3 to 4 inches below the collar and spanning 12 to 14 inches wide, it’s the natural home for large-scale artwork, sports numbers and names, band graphics, and any design that needs room to show genuine complexity.
One practical consideration with full back placement is that the design sits across a surface that curves and moves with the wearer. Designs with strong geometric structure or tight text at the edges can look distorted when the shirt is being worn rather than laid flat. Testing your mock-ups on a 3D mannequin view rather than just a flat product image reduces this risk considerably.
Full back designs are also the placement most affected by garment size scaling. A design that sits perfectly on a medium may need proportional adjustment on a 2XL to avoid looking undersized. Most professional print setups handle this automatically, but it’s worth confirming with your production partner before finalising artwork.
Sleeve Placements: Details That Build a Brand
Sleeve prints are the most underused placement in custom apparel, and that’s exactly what makes them valuable. In a market where center chest graphics dominate, a well-executed sleeve detail sets a design apart without requiring the garment to work harder than it needs to.
Standard sleeve placement sits 3 inches down from the shoulder seam, centered on the outer face of the sleeve. Size should be kept in the 3 to 4 inch range horizontally. At this location, the design wraps slightly as the sleeve curves, so designs with strong horizontal axes need to account for that. Stacked type, circular badges, and simple icons work particularly well.
Left sleeve, right sleeve, or both sleeves are all valid choices. Single-sleeve placement adds asymmetry that works well in contemporary apparel design. Matching sleeves create a cleaner, more uniform look that suits corporate or team apparel.
Not every print provider supports sleeve placement, and those who do may have specific constraints around print area and minimum garment size. Always confirm availability and technical requirements before designing for sleeve placement.
Combining Placements: How Multi-Location Designs Work
Single-placement designs are the default. Multi-placement designs, when done well, are what take a custom t-shirt from merchandise to something that feels like considered fashion.
The most common combination is left chest plus full back. The front carries a clean, professional logo in a restrained size, and the back delivers the visual statement. This structure works for almost every category: streetwear brands, music merchandise, sports teams, corporate uniforms, and event apparel all use it effectively.
Left chest plus sleeve is a subtler combination, suited to brands that want a layered identity without visual noise. The chest anchors the brand, and the sleeve adds a secondary mark that rewards closer attention.
Full front plus upper back is the boldest combination, used most often in high-impact streetwear and graphic apparel. The front demands attention and the back delivers a secondary message, whether that’s a logo, a phrase, or complementary imagery. This combination requires the two designs to be visually coordinated, not just related by brand.
“The best multi-placement designs feel intentional from every angle. Each placement should add something specific, not just fill available space.”
File Specifications That Affect Placement Accuracy
Technical file setup is where good placement intentions fail in production. The design you send to print needs to reflect not just the artwork itself but the correct dimensions, resolution, and canvas setup for the intended placement.
Resolution
Print files should be 300 DPI at final print size. A file that’s 72 DPI looks sharp on screen and blurry in print. A file set to 300 DPI at a small canvas size and then scaled up for production loses quality the same way. Build your files at the correct print dimensions from the start.
File Format
PNG files with transparent backgrounds are the standard for DTG and DTF printing. Transparency ensures the shirt fabric shows through the unprinted areas of your design rather than a white box appearing around your graphic. For screen printing, vector formats like AI or EPS are preferred, since they allow clean colour separation and unlimited scaling.
Colour Mode
Work in RGB for digital and DTG printing. Screen printing separations typically require conversion to spot colours or CMYK, but this conversion is usually handled by the print provider rather than the designer. Confirm the required colour mode with your printer before submitting final files.
Canvas Setup
Set your canvas to the exact intended print size, not the maximum print area. A 4-inch logo centered on an 8-inch canvas leaves white space that your printer needs to interpret correctly. A 4-inch logo on a 4-inch canvas is unambiguous. This small step removes a significant source of placement miscommunication.
Scaling Across Sizes: The Problem Most Beginners Miss
A design placed correctly on a medium t-shirt will not automatically look correct on an extra small or a 3XL. This is the scaling problem that catches most first-time custom apparel designers off guard.
The standard industry approach is to keep design dimensions fixed across all sizes rather than scaling the graphic proportionally with the garment. A center chest design that’s 8 inches wide on a medium is still 8 inches wide on an XL. The garment grows around it rather than the design growing with it.
This approach works well for most standard size ranges, roughly XS through XL. At the extremes, manual adjustment becomes worthwhile. On a youth small, an 8-inch design can look overwhelming. On a 3XL, the same design can look undersized against the expanded fabric. Creating size-specific artwork variants for the extremes of your size run is the cleanest solution.
If your production partner handles size-specific scaling automatically, confirm what their default behaviour is. Some platforms scale proportionally, which produces different results from fixed-size placement. Knowing which approach is being used before production starts is the only way to ensure the final product matches your intention.
Common Placement Mistakes and How to Avoid Them
- Placing designs too low on the chest: The most frequent error. A design centered at the midpoint of the shirt sits on the stomach when worn. Work from the collar down, not from the hem up.
- Ignoring seam proximity: Designs that cross or sit very close to shoulder seams and side seams are more prone to distortion and print quality issues. Keep clear of structural seams where possible.
- Using screen-size proportions for print decisions: Zoom out. A design that fills your screen at 100% zoom may be enormous at actual print size, or tiny. Work in real-world units from the beginning.
- Not requesting a physical sample: Mock-ups are useful and necessary. They are not a substitute for a physical sample, especially for large runs. One sample order before committing to full production is inexpensive insurance.
- Forgetting to account for fabric texture: Heavy-weight fleece and structured canvas fabrics hold print differently from lightweight jersey. A placement that works on a standard tee may need adjustment on a heavyweight hoodie or a structured bomber.
Putting It Together
A proper t-shirt design placement guide does more than tell you where to put a graphic. It gives you a framework for thinking about what each location communicates, how different placements serve different business purposes, and what technical decisions support accurate production.
The measurements in this guide are starting points, not fixed rules. Professional apparel designers adjust them based on garment style, design composition, and brand intent. But starting from established reference points, rather than guessing or eyeballing placement in a mockup, is what separates designs that consistently translate well to finished garments from ones that constantly require adjustment.
Know your placements. Build your files correctly. Request a sample before committing to a run. Those three habits will resolve the majority of placement-related problems before they reach production.
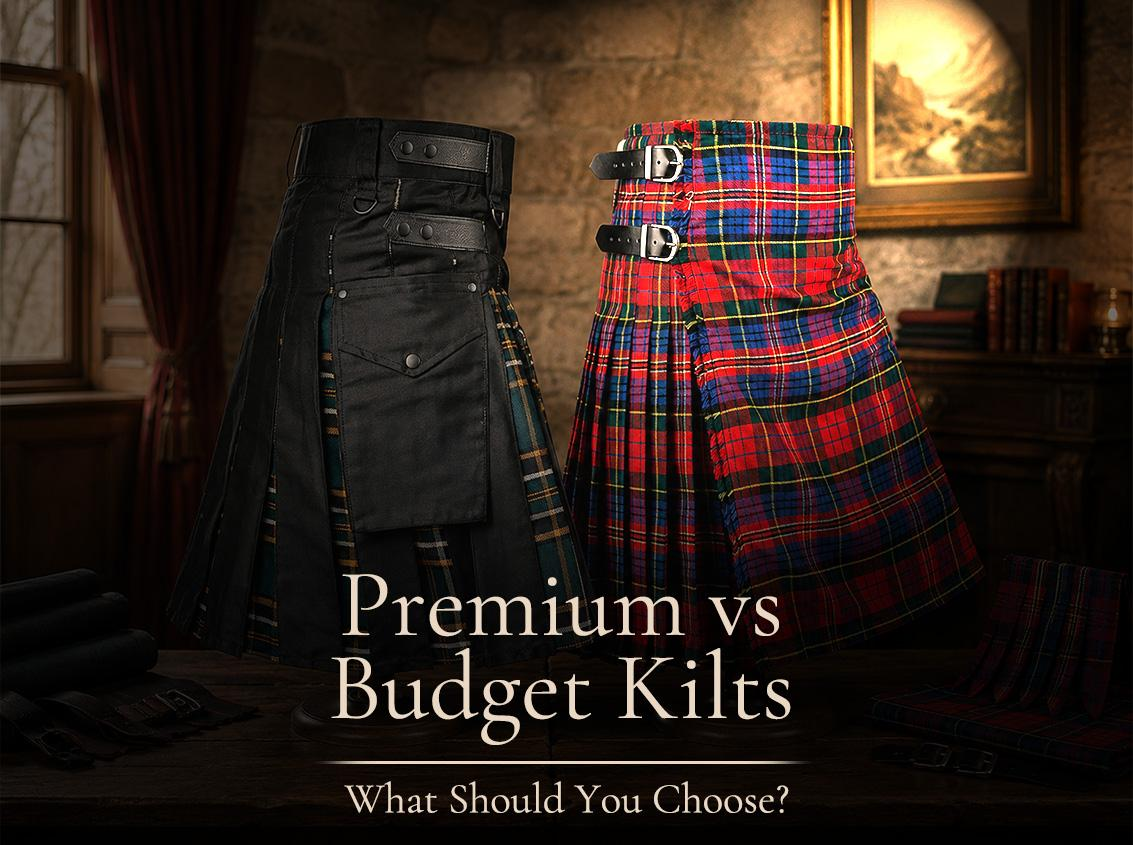
Choosing the right Scottish kilt is about more than finding a design you like. One of the biggest decisions you’ll make is whether to invest in a premium kilt or opt for a more affordable alternative. While price is an important factor, it’s not the only one. Fabric, craftsmanship, comfort, durability, and intended use all play a role in determining the best value.
Whether you’re buying your first kilts for men or adding another piece to your Highland wear collection, understanding the differences between premium and budget kilts will help you make the right investment.
What Is a Premium Kilt?
A premium kilt is crafted using high-quality materials and traditional construction techniques. These kilts are designed to deliver superior comfort, durability, and an authentic Highland appearance.
Most premium traditional tartan kilts are made from wool, offering excellent drape, rich texture, and long-lasting performance. They typically feature deeper pleats, quality leather straps, durable buckles, and meticulous stitching that enhances both appearance and fit.
Premium Scottish kilts are ideal for weddings, formal occasions, Highland games, ceremonial events, and anyone looking for a kilt that will last for years.
What Is a Budget Kilt?
A budget kilt provides the classic look of a Scottish kilt at a more affordable price.
Affordable doesn’t mean poor quality. Many budget-friendly tartan kilts are made from polyviscose, a durable fabric that closely resembles traditional wool while being lighter, easier to care for, and more budget-friendly.
Budget kilts are an excellent choice for first-time buyers, festivals, casual events, or anyone who wears a kilt occasionally. The key is choosing a well-made kilt with quality construction rather than judging it solely by its price.
Fabric: The Biggest Difference Between Premium and Budget Kilts
The fabric is one of the most noticeable differences between a premium kilt and a budget option.
Traditional wool remains the gold standard for Scottish kilts. It offers a luxurious finish, excellent pleat retention, and a natural drape that gives the kilt a refined appearance. Wool is also highly durable, making it a worthwhile investment for frequent wear.
Polyviscose has become one of the most popular alternatives because it offers the appearance of traditional tartan while being lightweight, comfortable, and easy to maintain.
At Highland Redstone, our collection includes premium-quality 8-yard tartan kilts in polyviscose, giving customers the authentic Highland look at an accessible price point.
Construction and Pleating Matter
A well-made Scottish kilt is defined by its construction as much as its fabric.
Premium traditional tartan kilts generally use more fabric, creating fuller pleats that move naturally and produce the iconic silhouette associated with Highland dress.
An 8-yard kilt is the classic example of this craftsmanship. The additional yardage provides greater depth and movement, making it a popular choice for formal occasions.
Budget kilts often use less fabric, resulting in a lighter garment that many people find more practical for casual wear, travel, and warmer weather.
Are Premium Kilts Better for Formal Occasions?
If you’re attending a wedding, formal dinner, or ceremonial event, investing in a premium kilt can make a noticeable difference.
The superior fit, richer fabric, and fuller pleating create a more polished appearance that pairs perfectly with formal Highland wear accessories such as a Prince Charlie jacket, waistcoat, sporran, kilt hose, and ghillie brogues.
If you expect to wear your Scottish kilt regularly for special occasions, a premium option often provides better long-term value.
When Is a Budget Kilt the Better Choice?
Not every occasion requires a premium wool kilt.
For festivals, everyday styling, casual gatherings, or your first experience wearing a Scottish kilt, a quality budget kilt is often the smarter option.
Utility kilts and hybrid kilts are particularly popular because they combine comfort, durability, and practical features such as cargo pockets and adjustable hardware. These modern styles are perfect for active lifestyles while maintaining the distinctive look of Highland wear.
Does a Higher Price Mean Better Quality?
Not always.
A higher price often reflects premium materials, skilled craftsmanship, and traditional manufacturing methods—but it doesn’t automatically guarantee the best choice for every customer.
The best kilt for men is the one that fits properly, feels comfortable, and suits your intended use.
A well-fitted polyviscose Scottish kilt can often look better than an expensive wool kilt that doesn’t fit correctly.
Before buying, pay close attention to:
- Fabric composition
- Pleating and yardage
- Stitching quality
- Leather straps and buckles
- Sizing information
- Care instructions
These details reveal far more about a kilt’s quality than the price tag alone.
Which Option Offers the Best Value?
The real value of a Scottish kilt depends on how often you plan to wear it.
If you’ll regularly attend weddings, Highland events, or formal celebrations, a premium kilt can be a worthwhile long-term investment.
If you only need a kilt occasionally, a well-made budget option may provide better value while still delivering excellent style and comfort.
Rather than focusing solely on the purchase price, consider the cost per wear. A premium kilt worn dozens of times often represents better value than an expensive garment that spends most of its life in storage.
The Best Choice for First-Time Buyers
If this is your first Scottish kilt, starting with a quality polyviscose model is often the most practical choice.
It allows you to experience traditional Highland wear without the higher cost of premium wool while helping you discover your preferred tartan, fit, weight, and style.
Many first-time buyers also enjoy utility kilts or hybrid kilts, which combine Scottish tradition with modern comfort and functionality.
Fit Is More Important Than Price
No matter how much you spend, fit is the single most important factor.
A properly fitted Scottish kilt should sit comfortably at your natural waist, fall to the centre of your knee, and allow the pleats to hang naturally.
Always use the retailer’s measuring guide instead of relying on your normal trouser size. Accurate measurements will always have a greater impact on appearance than choosing the most expensive option.
Why Choose Highland Redstone?
At Highland Redstone, we believe every customer deserves a Scottish kilt that combines authentic craftsmanship, exceptional comfort, and outstanding value.
Our collection includes traditional tartan kilts, 8-yard tartan kilts, utility kilts, hybrid kilts, and sports kilts, giving you the flexibility to choose the perfect style for your occasion and budget.
Whether you’re investing in a premium Highland outfit or purchasing your very first men’s kilt, our carefully selected range is designed to deliver quality without compromise.
Final Thoughts
Choosing between a premium kilt and a budget kilt isn’t about buying the most expensive option—it’s about choosing the right kilt for your lifestyle.
If authentic materials, traditional craftsmanship, and formal occasions are your priority, a premium kilt is an excellent investment. If versatility, affordability, and everyday comfort matter most, a quality budget kilt can provide everything you need.
At Highland Redstone, you’ll find a wide selection of Scottish kilts designed to suit every budget, occasion, and personal style. Whatever you choose, focus on quality, fit, and craftsmanship to ensure your kilt looks exceptional every time you wear it.

Introduction
A few years ago, buying perfume often meant choosing from the same well-known designer brands found in department stores. Today, the picture looks very different. More people are discovering smaller fragrance companies through online searches, social media, and recommendations from friends. Instead of asking which designer perfume is the newest release, many shoppers are asking which fragrance smells the best, lasts well, and suits their personal style.
This shift has allowed small fragrance brands to compete in ways that were much harder in the past. They may not have huge advertising budgets or celebrity campaigns, but many have earned attention by focusing on carefully developed fragrances and being open about how their perfumes are made. For shoppers, this means there are now more choices than ever before and more reasons to look beyond the biggest designer names.
Shoppers Are Paying More Attention to the Fragrance
One of the biggest changes in recent years is how people judge perfume.
Instead of choosing a bottle simply because they recognise the logo, many buyers spend time reading about fragrance notes, scent families, and how a perfume develops throughout the day. They want to know whether a fragrance feels fresh, woody, floral, or warm before making a decision.
This has helped smaller fragrance brands compete because they often explain their perfumes in straightforward language. Rather than relying on famous names, they let the fragrance itself become the main focus.
As more people understand perfume, they become more interested in quality and craftsmanship than advertising alone.
Independent Brands Can Focus on Fewer Fragrances
Large perfume companies often release many new fragrances every year to appeal to different audiences.
Smaller brands usually work differently. Many build a carefully selected collection instead of producing dozens of releases. This gives them more time to develop individual fragrances and refine how each one smells.
For example, someone looking for a bold leather fragrance may compare several perfumes before choosing a Fucking Fabulous inspired perfume because they already know they enjoy that particular scent style. In this situation, the decision is often based on fragrance character rather than the size of the company behind it.
This approach has encouraged many shoppers to judge perfumes on their own experience instead of brand recognition.
Honest Information Builds Confidence
Buying perfume online becomes much easier when brands clearly explain what customers should expect.
Detailed descriptions, fragrance notes, and information about production methods help shoppers make informed decisions. Many independent fragrance brands also explain how their perfumes are created, giving buyers a better understanding of the craftsmanship involved.
Independent fragrance brands such as Luxaro have helped increase interest in French-made fragrances and small-batch perfume production by focusing on carefully developed scent profiles rather than relying only on designer branding.
This openness has helped build trust with people who want to understand more about the fragrances they wear.
More Choice Benefits Everyone
Healthy competition is good for perfume lovers.
As smaller brands continue to grow, shoppers benefit from having more fragrance styles, different approaches to perfume making, and a wider range of scent profiles to explore.
People who enjoy fresh citrus fragrances can easily compare several options. The same is true for lovers of woody, floral, gourmand, or amber perfumes.
Many shoppers also enjoy browsing a Luxaro fragrance collection because it allows them to explore different fragrance families in one place and better understand how each scent style differs from the next. Looking at a complete collection often makes it easier to recognise personal preferences instead of focusing on only one perfume.
Greater choice encourages people to discover fragrances that genuinely suit their own taste.
Practical Advice for Choosing Between Big and Small Brands
There is no rule that says a designer perfume is always the better choice or that an independent fragrance will automatically suit everyone.
The best approach is to compare fragrances on their own merits.
Read the scent description carefully and pay attention to the fragrance family. Think about perfumes you have enjoyed before and look for similar notes.
Customer reviews can also provide useful insights, especially when several people describe the same strengths and weaknesses.
It also helps to learn a little about the brand itself. Companies that explain how their perfumes are developed, where they are made, and what kind of fragrance experience they are aiming to create often give shoppers more confidence before buying.
Most importantly, choose a perfume because you enjoy the fragrance rather than because of the name printed on the bottle.
Conclusion
Small fragrance brands are changing the way many people think about perfume. By focusing on craftsmanship, clear fragrance descriptions, and carefully developed collections, they have shown that quality is not limited to the biggest designer names.
For shoppers, this means more choice and a better understanding of what makes a fragrance enjoyable to wear. Instead of relying only on familiar branding, more people are comparing scent profiles, fragrance families, and the overall wearing experience.
Taking a little time to learn about how perfumes are made and how different fragrance styles work makes it much easier to choose a scent that matches your own preferences. In the end, the most satisfying perfume is usually the one that feels right for you, regardless of the size of the brand behind it.

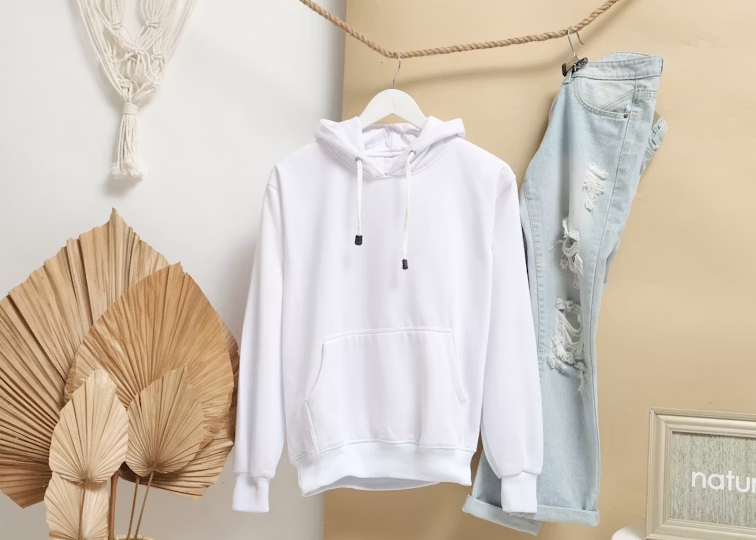
Finding the perfect hoodie size can make a huge difference in both comfort and style. Whether you are buying your first Essentials Hoodie Australia release or adding another piece to your collection, choosing the correct fit is one of the most important decisions you can make. Essentials Hoodies are known for their oversized design, which often creates confusion for first-time buyers who are unsure whether to size up, size down, or stick with their regular size. The good news is that understanding how Essentials Hoodie fit is relatively simple once you know what to look for. This guide explains everything Australian shoppers need to know about sizing, fit preferences, and how to select the right Essential Hoodie for their body type and personal style.
Understanding the Essentials Hoodie Fit
Before choosing a size, it is important to understand how an Essentials Hoodie is designed to fit. Unlike traditional hoodies that follow a regular cut, Essentials Hoodies feature a deliberately oversized silhouette. This oversized design includes wider shoulders, a roomier chest area, and longer sleeves. The relaxed shape is part of the signature streetwear aesthetic that has made the brand so popular around the world. Many first-time buyers assume they should size up to achieve the oversized look, but this is usually unnecessary because the hoodie is already designed with extra room.
Why Essentials Hoodie Sizing Feels Different
One of the most common questions customers ask is why Essentials sizing feels larger than standard hoodies. The answer lies in the brand’s design philosophy. The Fear of God Essentials Hoodie was created to embrace modern streetwear trends that focus on relaxed and comfortable fits. Rather than sitting close to the body, the hoodie is designed to drape naturally and create a loose silhouette. As a result, shoppers who are used to slim-fit clothing may initially find the sizing larger than expected. Understanding this difference can help prevent ordering the wrong size.
Should You Buy Your Normal Size?
For most people, the safest choice is to purchase their regular size. The oversized fit is already built into the design, allowing customers to enjoy the intended streetwear appearance without making additional sizing adjustments. If you normally wear a medium hoodie, choosing a medium Essentials Hoodie will usually provide the relaxed look the brand is known for. This recommendation applies to most Australian customers who want the authentic Essentials experience and prefer modern streetwear styling.
When to Size Down
Although regular sizing works for most people, there are situations where sizing down may be beneficial. If you prefer a more fitted appearance or dislike oversized clothing, choosing one size smaller can create a cleaner silhouette while still maintaining the signature Essentials aesthetic. Many customers who plan to wear their hoodies primarily with jeans or slim-fit trousers often prefer sizing down slightly to achieve a more balanced outfit. However, sizing down too much may reduce the relaxed look that makes Essentials Hoodies unique.
When to Size Up
Sizing up is generally not necessary because the hoodie is already oversized. However, some fashion enthusiasts intentionally choose a larger size to create an exaggerated streetwear look. This styling approach has become increasingly popular in 2026, especially among those who enjoy pairing oversized hoodies with baggy cargo pants or loose-fit denim. If maximum comfort and a highly relaxed appearance are your priorities, sizing up can work well. Just keep in mind that the hoodie may appear significantly larger than standard clothing.
Choosing the Right Size Based on Body Type
Body shape can also influence how an Essentials Hoodie fits. Individuals with broader shoulders often find that their regular size provides the ideal balance between comfort and structure. Those with slimmer builds may prefer sizing down if they want a slightly cleaner fit. Taller individuals usually appreciate the extra length provided by the standard oversized cut, while shorter wearers may choose a smaller size for a more proportional appearance. Ultimately, personal preference plays a major role in determining the best fit.
Essentials Hoodie Sizing for Australian Shoppers
The growing popularity of Essentials Hoodie Australia means more local shoppers are purchasing these pieces than ever before. Australian customers generally prefer comfortable and versatile clothing, making Essentials Hoodies a natural choice. When selecting a size in Australia, it is important to compare your measurements with the retailer’s sizing guide whenever possible. While the oversized fit remains consistent across collections, slight variations can occur between different releases. Taking a few moments to measure your chest and compare it with available size charts can help ensure a more accurate purchase.
Best Fit for Everyday Wear
If your goal is everyday comfort, your normal size is usually the best option. This allows you to enjoy the relaxed fit without the hoodie appearing excessively large. A properly fitted Essentials Hoodie should feel comfortable around the shoulders, provide sufficient room through the chest, and fall naturally around the waist. This balance creates a versatile piece that can be worn for casual outings, travel, study sessions, and weekend activities.
Styling Different Hoodie Sizes
The size you choose can also influence your overall outfit. A standard oversized fit pairs perfectly with cargo pants, joggers, and modern sneakers. This combination creates the classic streetwear appearance associated with the Essentials brand. A slightly smaller fit often works well with slim-fit jeans and minimalist footwear for a cleaner, more refined look. Meanwhile, extra-large oversized fits are commonly styled with baggy trousers and statement sneakers to create bold streetwear outfits that reflect current fashion trends.
Why the Fear of God Essentials Hoodie Remains Popular
The continued success of the Fear of God Essentials Hoodie comes from its ability to deliver comfort, quality, and style in one package. Its oversized silhouette appeals to modern fashion preferences while maintaining versatility for everyday wear. Unlike many trend-driven garments, Essentials Hoodies and Essentials Shorts remain relevant because their design focuses on timeless simplicity rather than short-lived fashion movements. Choosing the right size allows wearers to fully appreciate these qualities and enjoy the hoodie exactly as intended.
Common Sizing Mistakes to Avoid
Many first-time buyers make the mistake of automatically sizing up because they hear Essentials Hoodies run large. In reality, the oversized design is intentional and should not be confused with incorrect sizing. Another common mistake is choosing a size based solely on appearance rather than personal comfort preferences. Taking time to understand the intended fit and considering how you plan to wear the hoodie can help avoid disappointment after purchase.
Final Thoughts
Choosing the right Essentials Hoodie size in Australia is easier once you understand the brand’s signature oversized fit. For most shoppers, selecting their normal size provides the perfect balance of comfort and modern streetwear style. Whether you are buying your first Essential Hoodie, adding another piece to your collection, or investing in a Fear of God Essentials Hoodie, understanding the sizing philosophy can help you make a more confident purchase. By considering your body type, style preferences, and intended use, you can find the perfect fit and enjoy everything that makes Essentials Hoodies one of the most popular streetwear staples in 2026.

Spanish Vocabulary Guide: How the Word Viejo Changes Meaning Across Contexts

Expanding Your Vocabulary: A Guide to Describing the World with “U” Adjectives

The Easy Way to Understand Composite Bonding Newcastle

Dental Implants Middlesbrough 7 Things That Happen Inside Your Jaw After Placement

Discovering the joys of camping: comfort, adventure, and connection

Spanish Vocabulary Guide: How the Word Viejo Changes Meaning Across Contexts
Spanish is a vibrant language where a single word can express a literal fact, a warm emotion, or casual street...

Expanding Your Vocabulary: A Guide to Describing the World with “U” Adjectives
Whether you are crafting a captivating blog post, writing a novel, or simply trying to express yourself more clearly in...

The Easy Way to Understand Composite Bonding Newcastle
Composite bonding has become one of the most popular cosmetic dental treatments in the UK, offering a simple yet effective...

Dental Implants Middlesbrough 7 Things That Happen Inside Your Jaw After Placement
Dental implants have transformed the way people restore missing teeth, offering a stable and long-lasting solution. For those considering Dental...

Discovering the joys of camping: comfort, adventure, and connection
Stepping away from city lights and crowded routines, camping invites a reconnection with nature and an escape from daily stress....


The Trimmer Edit: What Different Price Ranges Actually Get You
The trimmer aisle has officially entered its gadget era. One model looks like lipstick, another comes with six attachments, and...


Common Automatic Watch Mistakes That Are Slowly Damaging Your Timepiece
An automatic watch is a small, self-contained machine. Every rotor spin, every jewel bearing, every tiny spring inside it is...


Who is Dan M. Jones? Untold Story of the SEO Expert and Entrepreneur
Dan M. Jones is a British entrepreneur, leading SEO consultant, author and public speaker best known as the founder of...
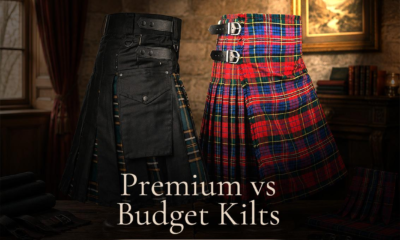

Premium vs Budget Kilts: Which One Is Right for You?
Choosing the right Scottish kilt is about more than finding a design you like. One of the biggest decisions you’ll...

Driving fence posts with a hydraulic post driver instead of digging every hole by hand
Across a Canadian summer, ranchers race the short season to string new fence before the ground hardens and the work...
-

 Tech6 months ago
What is Spaietacle? Inside the New Era of Interactive Digital Platforms
-

 Food6 months ago
Crocolini Explained What Is Crocolini Vegetable Toy and More
-

 Home Improvement4 months ago
4 Cost Factors That Affect Air Conditioner Installation Cost in Singapore for Split AC Units
-
 Entertainment6 months ago
¿Es ENGWE una Buena Marca de Bicicletas Eléctricas? Análisis Real en España
-

 Celebrity12 months ago
Meet Billie Early — Everything About Cameron Diaz’s Mother,
-

 Celebrity1 year ago
Shaun Holguin: Jodie Sweetin’s First Husband and a Life Outside the Spotlight
-

 News12 months ago
Who is Taimi Li? Everything About Jet Li’s Daughter
-

 Celebrity12 months ago
Meet Corrie Bird – Larry Bird’s Daughter Carving Her Own Path